I was excited when I realized I had everything I needed to do my resin countertop about three days ago. Because of the design I finally decided on, it cost me about $50 more than I had originally planned for. The entire thing was about $200. I suppose I could have just gone to a Menard’s or Home Depot and ordered a laminate countertop or I could have installed the charcoal roll of laminate the previous owner bought for the dash and counter, but it wouldn’t have been all that customized and it wouldn’t have looked like stone.
In the end, I got to choose my colors and I customized the design to look exactly like I wanted it to. Not to mention that it is 100% unique and I can say I did this myself!
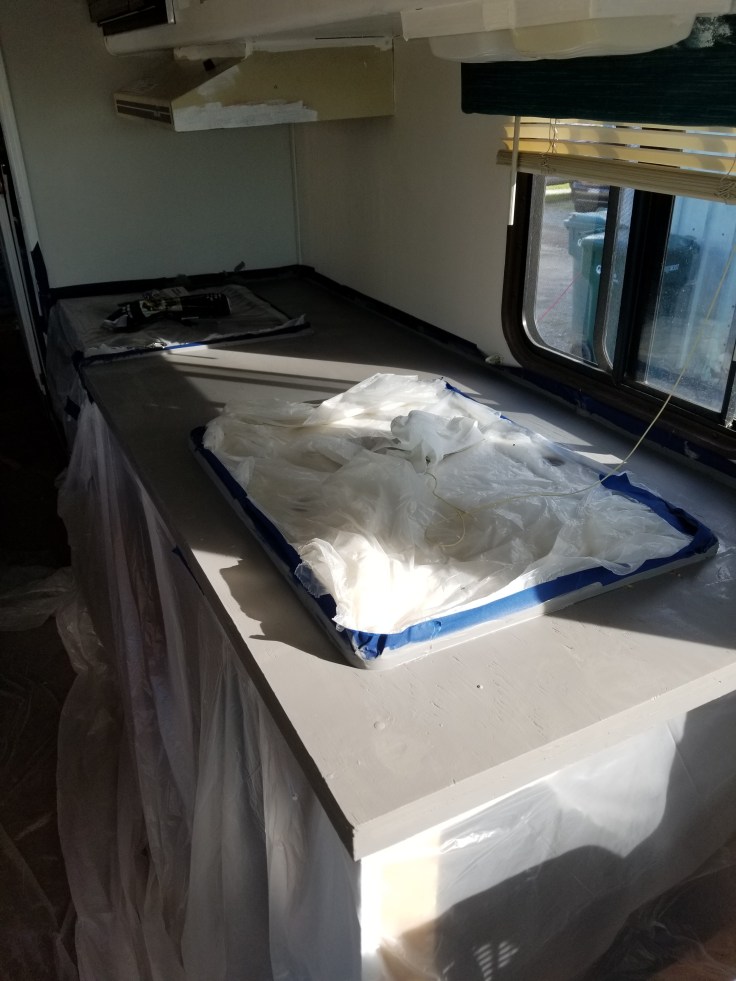
The entire process didn’t take long. I think I spent more time taping everything off than I did on the coating. The coating itself only took about 15 or 20 minutes. The rest of the time is waiting for it to dry. It does need to dry for 24 hours before you can put a final clear coat of the resin and hardener mix on (I plan on doing that tomorrow).
I first had to paint the wood countertop with a paint/primer mix from Home Depot called Sued Grey. I don’t have a Home Depot close to me (there is one about an hour from where I live), so I ordered some product online. This was before I realized I was going to be near that Home Depot a couple days later and could have just gone into buy everything! As it turns out, I could not find what I ordered in the store, shipping was cheap and so it turned out well anyway. On the website, you can order a sample paint, so I think it cost about $4 for a sample of Sued Grey. The smallest containers of that color in the store were around $14 to $17. I had a very small amount of counter to do (approximately 3 to 4 sq. ft.), so the sample worked. I even had paint leftover.
I started by taping everything off, including taping on plastic drop cloth I bought from Dollar Tree down the front and side of the cabinet, because this stuff does drip over the edge when you use it. I also used Dollar Tree tape (hope that doesn’t prove to be a mistake later).
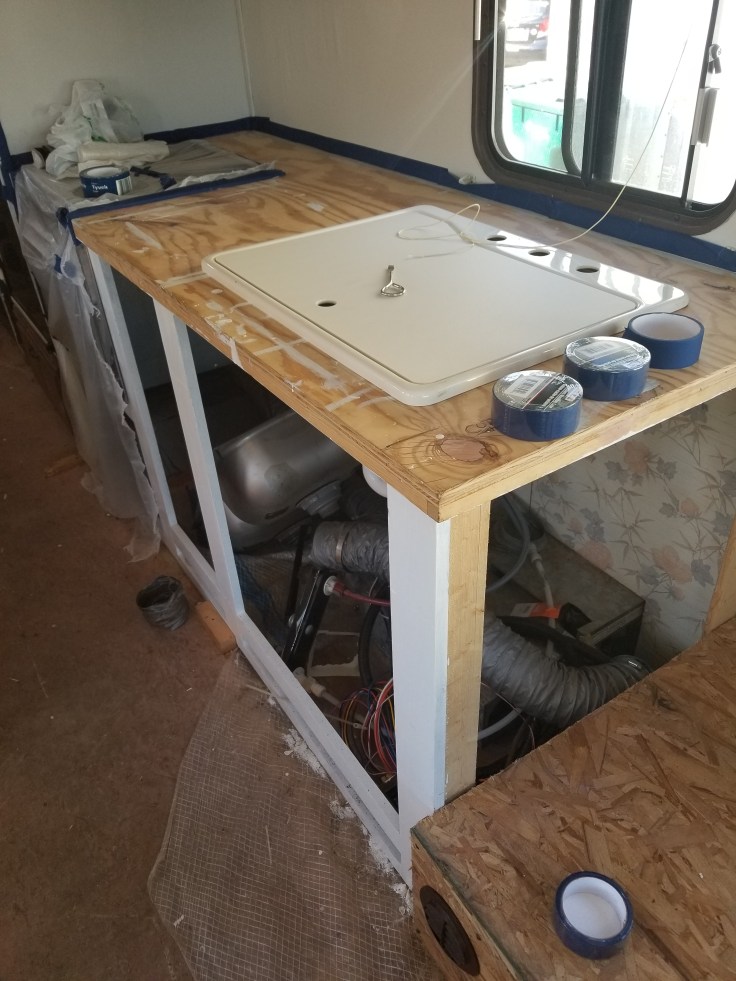
I painted 2 coats of the paint/primer on the wood, sanding with 220 sandpaper in between.
I then “fogged” some of the black spray paint over the grey. Fogging pretty much means that you lightly mist areas of the surface (randomly).
After the black spray paint dried, it was time to to apply the resin/hardener mix that I got from Stone Coat Countertops. This was easy. You mix equal parts of the Resin and the Hardener. Because I had such a small amount of countertop to do, I was able to order their sample kit, which costs $50 plus shipping. I believe it does 10 square feet. I’ll have some leftover if I want to do the same treatment to the very small outdated countertop for the bathroom sink. At some point, I probably will, so they match.

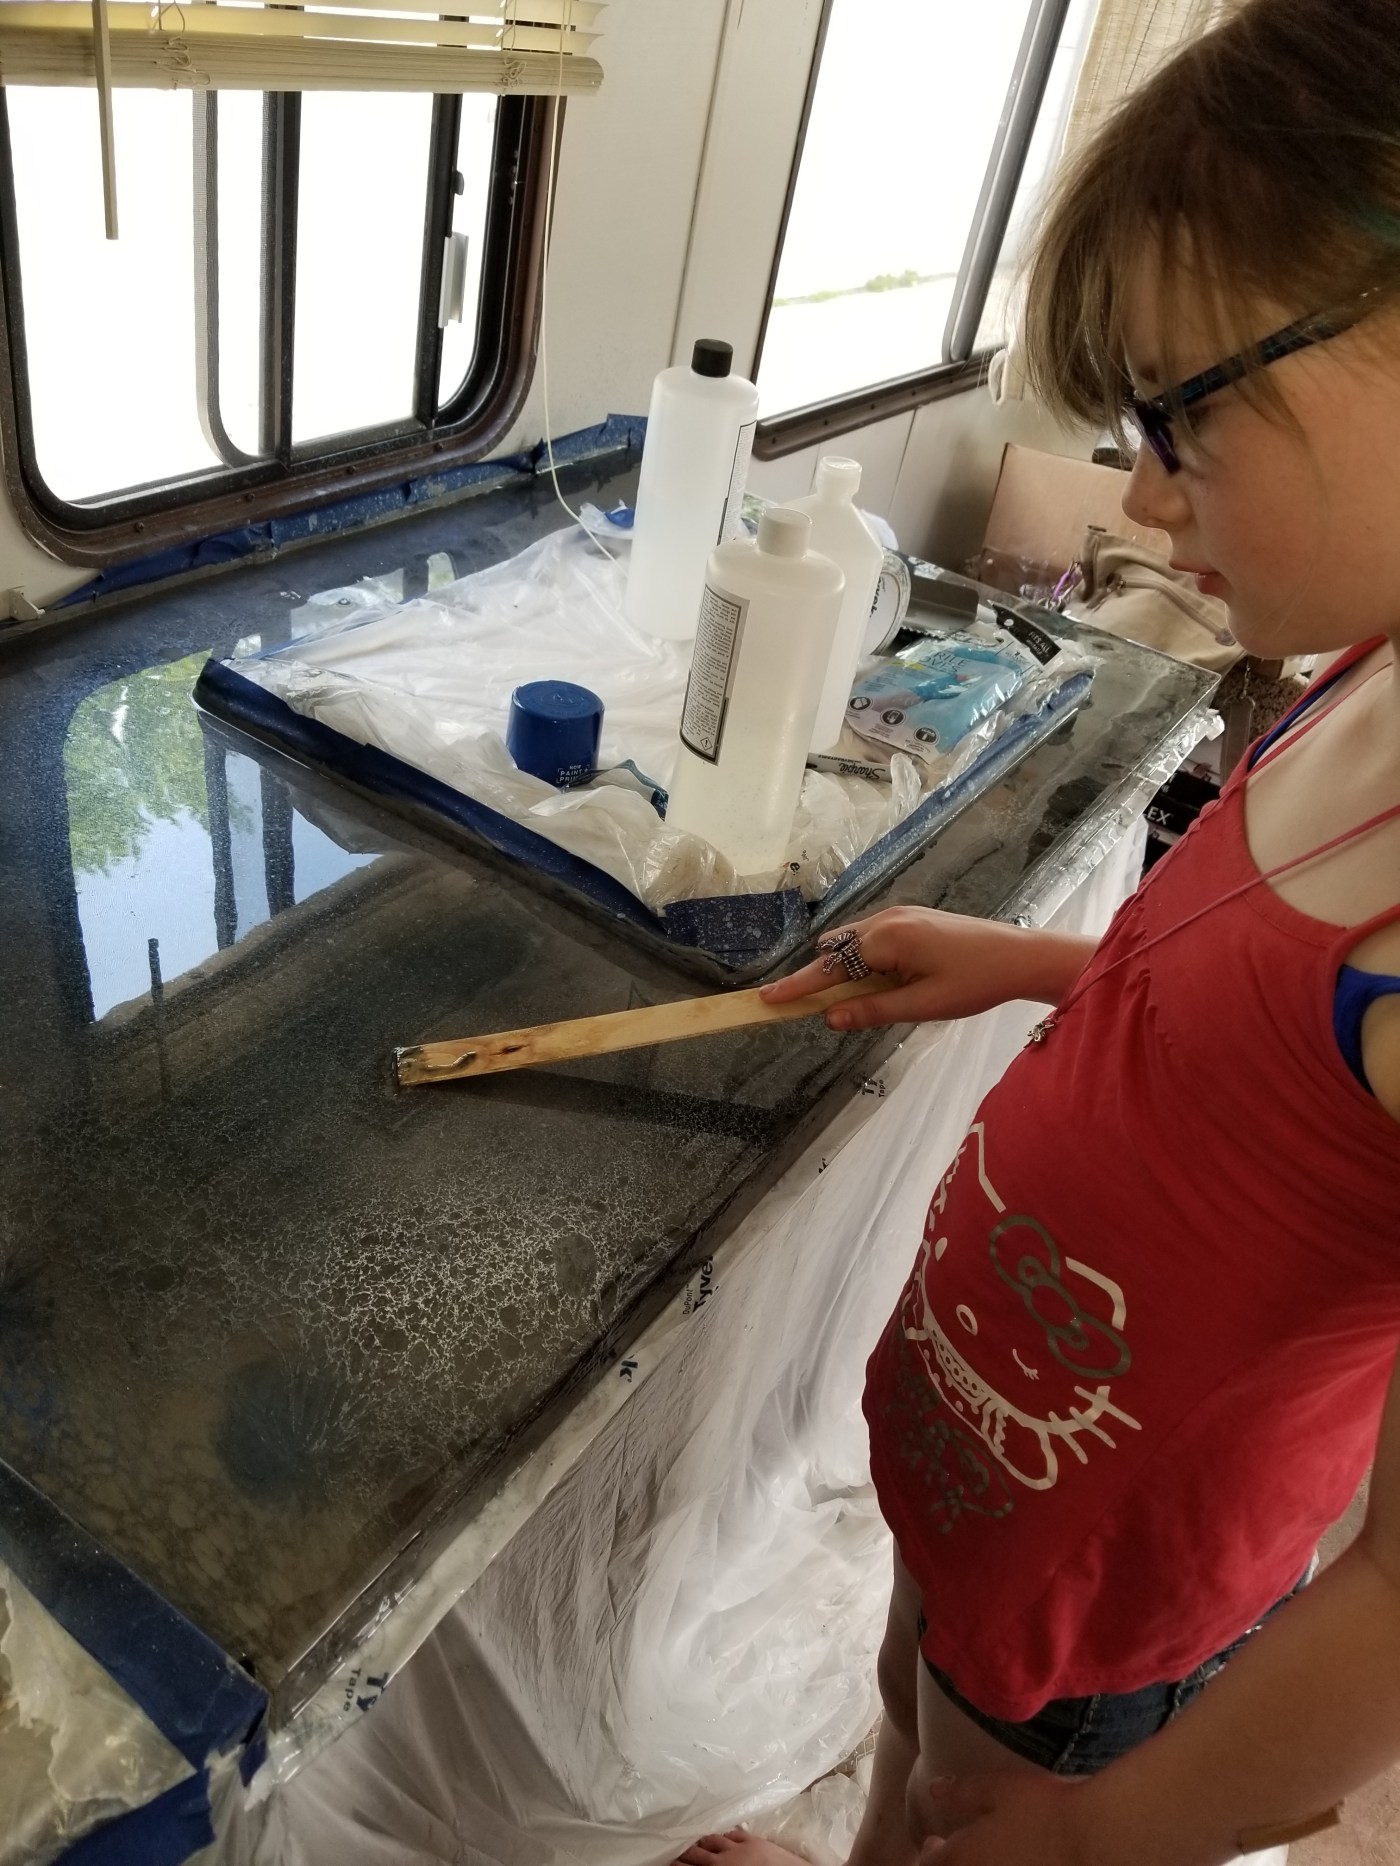
Now comes the fun part. I got to play around with the spray paint and the metallic sprays. At first I followed the instructions in the video I’d watched for this particular design (LIQUID EPOXY with a paint stick), but in the end I just did what I wanted until it looked the way I wanted. The color recipe for this particular design is called Lace Blue.
I bought three spray paints for this color recipe: Gloss Black, Gloss White and Gloss Dark Blue (on the video they say to get Cobalt blue, but I couldn’t find that, so I just pulled up Cobalt Blue on my phone and held it up to the paint can caps until I found one that was pretty close).
I also purchased three metallic powder colors from Stone Coat Countertops: Deep Silver, Bright Silver and White. These little guys were $15 a piece and from Walmart I bought three empty spray bottles and rubbing alcohol to mix them in. I eyeballed the alcohol and put approximately 6 to 8 ounces in each bottle, marked the bottles with a permanent marker and added each metallic color. You have to shake these really well before you use them. I put the spray on these at the finest mist I could.
I started by fogging in the black spray paint, followed by the blue spray paint and ending with the white. I did these one more time in random patterns. I then came back with the metallics, alternating between them.
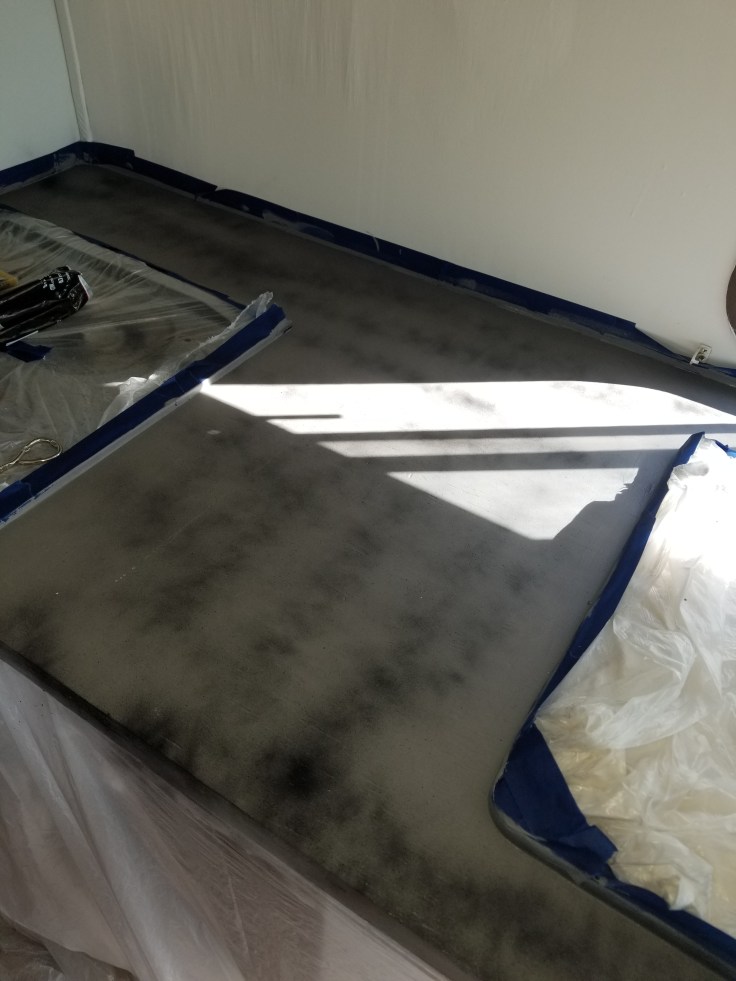
After the colors had been added, I used a paint stick to kind of pat or chop certain areas in a random design. This created a very cool circular effect. We did this, playing with the colors, until it looked the way we wanted.
I was very pleased with the end result and left it alone to dry. This is what it looked like when it was done:


Everything has to dry for 24 hours, so tomorrow after work (I work until about 11), I will stop over and put the final coat on. The guys from Stone Coat Countertops recommend buffing the finished product after it has cured. I will probably do that. I’m not using the RV right now, so this was the perfect time to get this done. If I remember correctly, you can’t use the countertops for something like 7 days.
I absolutely loved this process. For the dramatic effect I got, it really was not all that much work. One tip about taping everything off is to make sure to tape off the backsplash. I only did a line of painters tape and unwisely did not tape plastic up over the wall, so when I sprayed my metallics it splattered. It’s okay, because I will either touch up with paint or I may cover it with a backsplash, but now I have to do something with it.
Also, make sure you wear gloves! I got a 12 pack from Walmart’s paint section for $3 or $4. It’s worth it.
Now my big fear is that with as fantastic as the countertop looks right now, something will be messed up when I pulled the tape and plastic away! I hope not, but I am dying to know. I won’t be able to do this until Sunday. *sigh*
I will post final photos once the tape is removed, so you can see how it looks with the sink and oven, etc.
Here is one final photo of my daughter, Graywyn, chopping areas with the paint stick:


Leave a comment