My life began to change 3 1/2 years ago (roughly). I’d been living in Ireland with my daughter and (then) boyfriend for a couple of years. We’d been informed at the beginning of July (2014) that we could no longer stay there. Our lack of a visa had made us illegal, which was not news, but now someone had noticed. 2 1/2 more years there and we could have applied for citizenship.
We had less than 3 weeks to pack our things, unload as many personal belongings as we could from what we had accumulated and head back to the states. We’d been living in furnished homes since leaving for Cairo in August, 2010, but we had a small child with us and had accumulated toys and things like that.
I remember we were running so late at the airport the day we flew out (my birthday; July 16th) that we were literally running as we unloaded the golden lab (called Crixus) in his carrier and I met the buyer of my car, who gave me a quick 400 Euro in the airport parking garage. I quickly apologized for the dog hair and we raced inside. From that day forward, my life not only would be different, but it would be an uphill battle.
A lot has happened between then and now, but last year I found myself single, stuck in the state I grew up in (Wisconsin), which I loved, but no longer wanted to be/live in, so hated. It was just me, my daughter and our small zoo of animals. I never wanted to stay here. I wanted to go right away, but it wasn’t in the cards for us, so we re-settled in the area.
I realized last winter that I can’t handle the Wisconsin winters anymore. Well, I’m doing it, so perhaps I can, but really don’t want to. Dealing with the snow is too much. It pushed my over the edge of being able to tolerate my existence here and feeling like I was going to crack. I realized that I was walking in place again, like I’ve done so many times before. It was time to get my shit together.
I formulated a plan in my mind. My small zoo now consists of the golden lab (Crixus), a Great Dane (Shaggy), a tortoise (now 1 1/2-years-old), Blue Ears, the rabbit, and Shakespeare, my parrotlet. How would I ever find a place to rent? This would especially be hard because I wanted to relocate across the country to Oregon, or possibly Washington. I was looking for either Irish-similar weather I’d grown so accustomed to or the western dessert I also knew and loved. Oregon seemed like a place to find exactly what I was looking for.
It hit me one day. By now I’ve had the plan in the back of my mind from so long that I don’t even know how I thought of it or what I was doing when I thought of it. I just know that before last year’s taxes, I’d decided I was going to buy an RV. I went back and forth between buying a travel trailer or and RV. I’d settled on an RV (despite people who care about me telling me the trailer might be better), because I can drive it with or without pulling behind a vehicle. Either way, it is a small home on wheels.
With an RV, I could load up my animals, drive to where I wanted to go (preferably at the beginning of a summer) and we could check out different places. We’d find a suitable place to rent/live over the summer, hopefully before school started in fall, so we’d end up in a safe place, unrushed. It seemed like the perfect plan and if I wanted to be totally unrealistic with myself, I thought I could do it last summer (ha!).
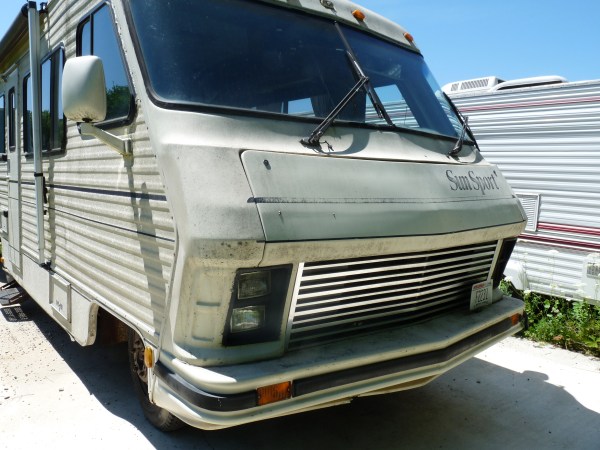
I tried and tried to find an RV, but found nothing. Finally, out of desperation I posted an ad in a Facebook group asking if anyone knew of or had an affordable RV for sale? It didn’t have to be pretty or updated, but it did have to be functional and affordable. A woman contacted me nearly right away telling me about her 1986 Gulf Stream Sunsport. I now know it is 30′ long. At the time, I was told it was a bit bigger. She said the cabinets had been replaced and that a lot of work had been done to it. She said all the flooring (tile, she said) had been purchased already and would come with it. It ran and drove, but her husband had been working on remodeling it for years. They had purchased a new one and she wanted this one gone. They wanted $2,300 for it.
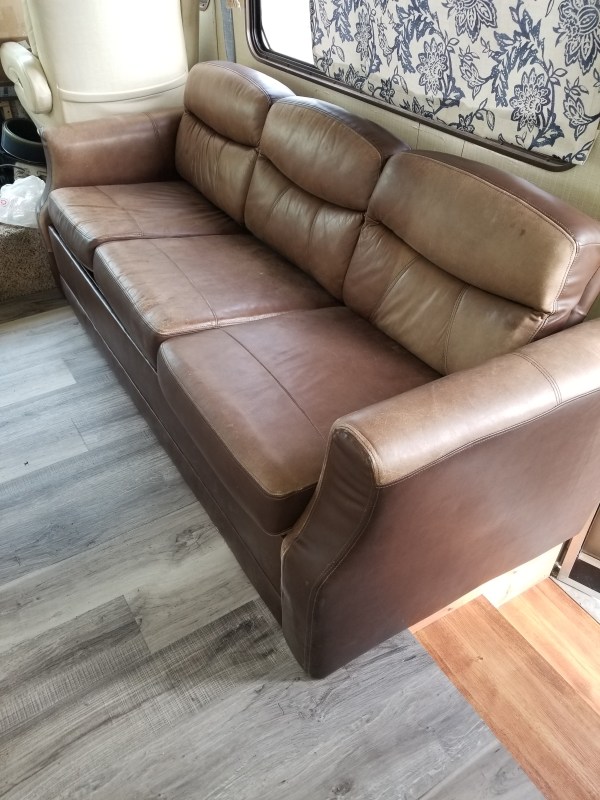
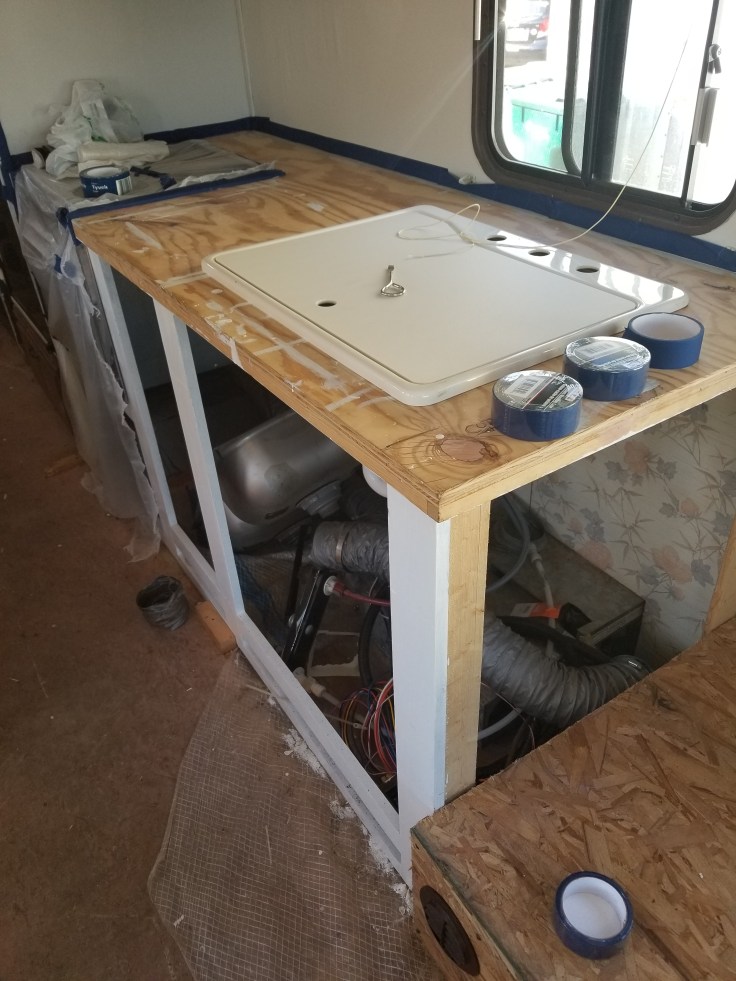
I had my tax return, which was around $3,100. Excitedly, I rode with my dad to Cambria to take a look at it. The seller had driven it to a parking lot to meet us. The interior was much different than described. More had been done to it than I’d been told, but also less. The “tile” she’d been talking about was vinyl tile. As someone who has installed all types of flooring and used to own a construction business, I can say that I was not impressed. Her husband insisted he had fixed the roof. I could see that he’d replaced the subfloor, but the cabinets were ripped apart. The 80s were very apparent inside, but it wasn’t gross or disgusting, just a bit in shambles. The cloth interior was a teal and green design and I instantly thought it looked dark inside with the fake wood and the wicker design in the center of most of the cabinet doors. The lower doors for the cabinets had no hinges and I could see it had not been well thought out. There was a brand new, never-used toilet…sitting uninstalled in the bathroom. Old wallpaper covered everything and the ceiling had turned icky with age.
For some reason, the old owner had pulled apart the dash. I guess he thought it was important to replace, but in doing so, he’d pulled apart all the wiring. Nothing was hooked up. I’d immediately put money down on the RV to hold it until I could get a cashier’s check from the bank for the remainder and we’d signed something. After I’d put the money down, they contacted me and said the brakes had gone out and they would repair them before handing it over to me. This repair took weeks and I wondered if I’d ever truly take possession of it. I eventually did sometime in May. I believe they delivered it to its storage location around the 8th.
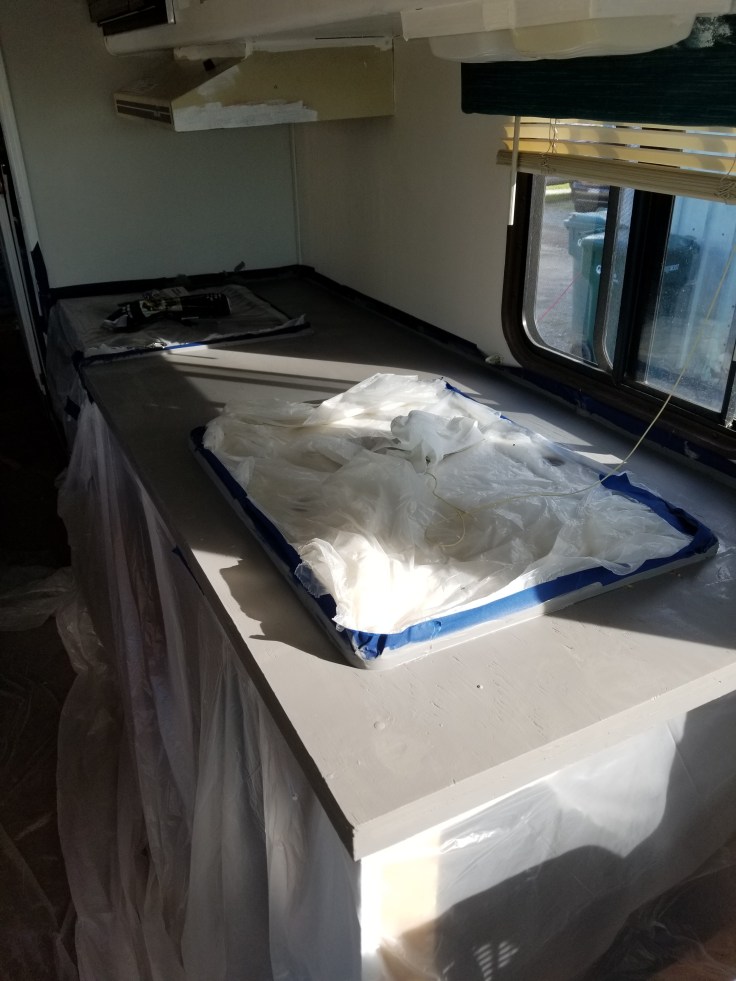
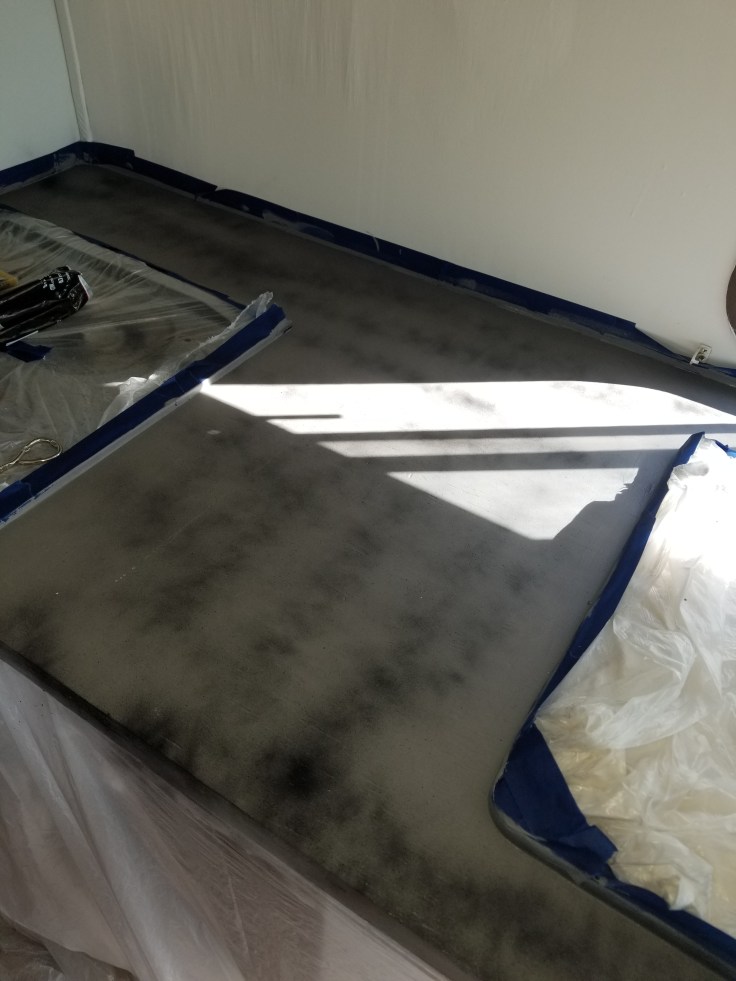
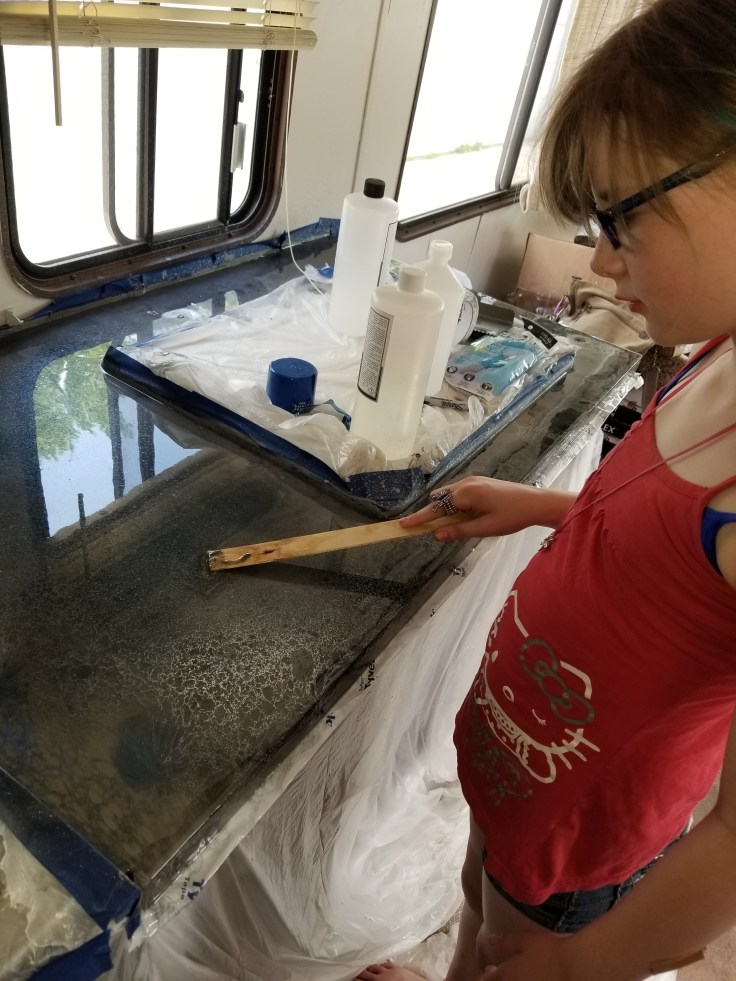
My then 9-year-old daughter and I spent every extra minute all spring, summer and fall (while the weather was still warm) working on it. We made progress, but not near what we wanted. Paint was the cheapest beginning and we set off painting all the cabinets white and the wallpapered walls a very light grey. We may have gotten half of it done.
Not long after I got the RV, I was lucky enough to find two cream colored leather captain’s chairs and a fold-out brown leather couch from a newer RV for free on craigslist. I was lucky enough to get them. Slightly worn, but much improved from the seats I ripped out. Those were installed (by me) in the summer. At one point, I also found replacement dinette cushions off of craigslist. I think I paid around $100. They were used, but were like brand new, in perfect condition and were a brownish color that went well with my cream and brown furniture.
By the time Halloween rolled around, it was just too cold to do much more and by then I saw what I’d accomplished, but also how far I had to go. I shook my head at myself, wondering how I would be able to accomplish all I needed by the summer of 2018, which was my new goal for leaving. By December I’d made it up in my mind that I was leaving by then no matter what. While I’d been spending all this time working on my RV, I’d also been trying to finish the house I was renting. I’d committed to installing flooring in the living room, kitchen and three bedrooms. All was done except the kitchen. I’d also painted two of the bedrooms and the living room and had partially painted the bathroom. My dog had ripped up the brand new bathroom flooring my landlord put in the winter before, so I also have to replace that.
By the first of the year, I had this feeling like things were going to work out for me this time. I realized I may have to let go of things. Over the summer I’d paid a guy to organize my over-flowing garage so I could find things. After he’d done that, I could actually get two vehicles in it and could walk through it and see what I had. I realized 85-95% of it would have to be gotten rid of. I already knew I’d sell my couch for what I could get for it before I left. We were taking no bedroom furniture of my daughter’s, per her request, and she wanted to get rid of the majority of her toys, because she is getting older and no longer wanted to play with toys. That left my bedroom set, my grandparent’s dining room set, one single leather rocker/recliner I felt I had to have with me, electronics, tools I wanted to keep and possibly a solid wood and very heavy (and unmanageable) long dresser I have in my living room that I use as an entertainment stand. I can’t forget all of my kitchen appliances and things I do not want to part with or have to replace.
I found quotes online for various things: moving pods, moving trucks (like U-Haul and Budget), storage buildings, moving companies–whatever you can think of. It all came down to a need for a few thousand dollars. Somewhere along the line I had it in my head that I would need $6,000 to move. I would need gas money to get there, money to rent a place to put the RV, full coverage insurance on the RV and roadside assistance, food money and “oops” money for things I could not foresee.
I was happy to see my taxes were going to give me about half that. I was even more happy when I took my Explorer to a local mechanic who said another customer had offered $2,500 to buy it. I’d purchased it 2 years before for just $550. I thought that was a nice profit and that $2,500 would almost get my to what I felt comfortable leaving with.
Then something shitty happened. My Explorer was parked outside of the shop waiting to be repaired and some guy (high and/or drunk out of his mind) stole it, committed another crime in it and totaled it within just a few hours.
Luckily, I’d had full coverage insurance on it. Progressive moved quickly and sent me a check for around $1700-something (after my $250 deductible). Something clicked in my mind and I sat down and re-figured some of the expenses I thought I’d have in leaving for Oregon. I realized I could lower my numbers by quite a bit. I’d had it worked out with that same mechanic to pay him a deposit and a monthly amount to fix my vehicles and do repairs on the RV. He’d looked it over and determined it needed brakes, fuel lines, u-joints, he could do the re-wiring, and it needs its roof re-sealed again. He said we could store it at his shop and I could work on it there. With heat in it, I could get things done in cold weather. He said he could have it done by June, but after I re-figured, I asked him if I just paid him for it, could he do it faster. Of course, he said yes.
I re-arranged the plan in my mind. I would rent a storage building near where I lived and commit to bringing as many boxes and tubs as I could each weekend. My daughter and I would go through them and take only over what we intend to move. I’d number each one as I put it in, so by the time I was done, I’d know how many I had. This information is important for various moving quotes. This would also be helpful, because I’d received a letter in early January from my landlord that he was going to put the house I was in up for sale around March 1st. Of course, there would be the opportunity to stay, but also I may have to move. The stress was all too much and that was when my problem-solving mind went into overdrive to figure a way out of my problems. Bad thing after bad thing kept happening, but many things seemed to be leading me out of the state, where for some reason, I felt this black cloud I seemed to be under would be lifted.
I started looking through craigslist searching Washington and Oregon for RV sites. I’d been thinking I would go to an RV park and had found one as cheap as $350 a month plus electricity, but then I came across an ad for a single family that had an RV site with hookups on their property. I researched their area and really liked it. I’d emailed them and had received a voicemail from the husband the next day. I called back and got his wife, who I had a really nice conversation with. I instantly liked her and could tell she felt the same. Unfortunately, they were prepared to rent to me and I was prepared to rent, but was not ready to go. They said they couldn’t wait until June, but had not had an good prospects yet (except me). We agreed they would let me know if they rent it and I would contact them when I was ready to go to see if their spot was still open.
I realize now I may not get to rent their spot, but the rush is driving me to push harder to get out of here faster. Even if the opportunity slips away, the more I can get done in the shortest amount of time will put me in a better spot. If my landlord sells my house while I am still here and I decide I have to move, it would be nice to be able to just go to the RV. It would save me money.
So that is where I am at. My next step is to put insurance on the RV, so it can be driven or towed to the mechanic and he can begin. I also need to rent that storage building, which I think is going to cost me about $50 a month. I’m waiting for my Progressive check to clear. I put it in a relatively new bank account and they are sitting on it for 5 business days. My first purchases will be insurance and roadside assistance and then the rental unit, which I plan to pay at least two months of. I still don’t know if I will rent a pod to put my stuff in, store and move to Oregon when I go or if I will leave everything in storage here and rent a moving truck later. It makes more sense to me to do the pod and I feel more comfortable about having my things in the same state. That way, if something goes wrong and I need to remove the items, I can. If I am in Oregon and for some reason cannot pay the rental in Wisconsin, all of my things would be lost to me. Not just some of my things, all of my things.
This was a pickle I’d have to conquer once I get ready to move. A lot will depend on the amount of money I have available to me. The good news is that I work from home and so my income will move with me and will not change. I get paid weekly, so even if I am running low on funds when I first get there, I’d get paid pretty soon right after.
Tiny home living and unconventional housing is becoming more popular. The more I read about other people’s lives, the better I feel about my plan, which to some people, sounds crazy. Sometimes I’ve laid awake at night asking myself I am crazy, taking my now 10-year-old daughter and our small zoo across the country to live in a tiny space. I realized, though, that it’s a very sound decision in a life that has become too expensive. I may even stay in the RV for a year instead of finding a place right away. If one year of slightly uncomfortable living would get my debt paid up or off and provide me the opportunity to buy my own home or make a step toward where I want to be in life, why not? It seems like a small price to pay. I even think about buying a piece of land to build on. A place where I can plunk my RV down while I continue onto the next step of my plan. It’s a race to provide my child with a relatively normal childhood before we both miss out on the stuff that makes it fun.
Meanwhile, I plan on detailing my steps here for anyone who is interested. Perhaps this type of choice would be right for you or maybe you have your own experiences to share with me. If you’re interested in reading more about alternatives way to save money in rentals, check this article out: 30 photos show the extreme lengths millennials will go to live in cities instead of suburbs