Dancing Chicken Recipe: Easy Soy Garlic Curry Chicken Over Rice
Some recipes do not look like much at first glance, but once you make them, they earn a permanent place in your dinner rotation. That is exactly what happened with this Dancing Chicken recipe.
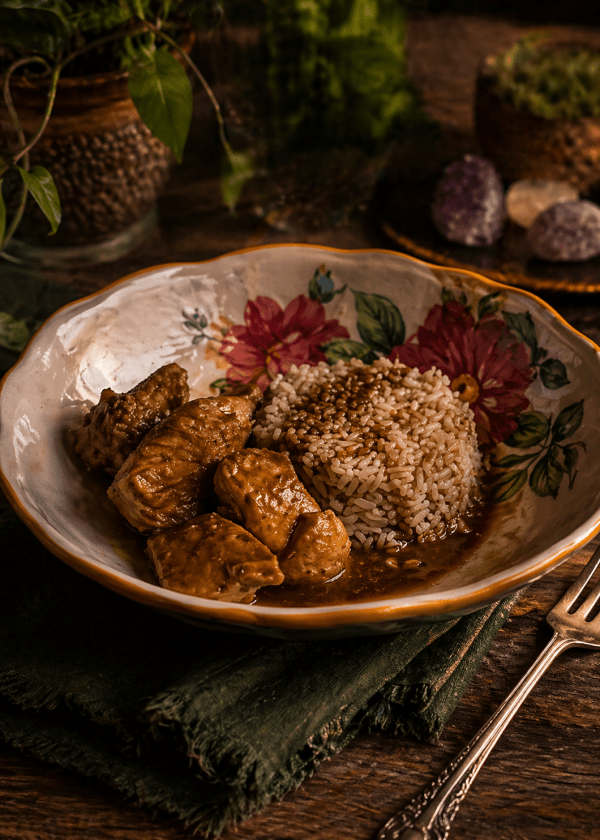
This easy baked chicken dish is made with simple ingredients like soy sauce, garlic, curry powder, and a little sweetness, but the finished flavor is rich, savory, and incredibly satisfying. Served over rice, it becomes an easy comfort-food dinner that feels both practical and special.
It is also a great recipe for intentional eating. Because the chicken is cut into bite-sized pieces before marinating, every piece gets coated in the sauce, and it is much easier to portion for lighter meals or more filling dinners.
If you are looking for an easy chicken recipe with bold flavor, this one is worth trying.
The Story Behind Dancing Chicken
I’ve been making this recipe since around the year 2000. It’s one of those handwritten recipes that has stayed with me through years of moves, different homes, and different chapters of life.
My recipe box has traveled across multiple states and countries with me, and this recipe has always been in it. It’s one of those simple, reliable meals that never gets old.
What’s interesting is that when I recently searched for Dancing Chicken online, I couldn’t find it anywhere. It seems like this version may have quietly disappeared over time.
So this might be one of the only places you’ll find it now.
Is Dancing Chicken Similar to “Marry Me Chicken”?
If you’ve heard of the popular Marry Me Chicken recipe, you might be wondering how this compares.
While the flavors are different, both recipes fall into that same category of simple, comforting chicken dishes that surprise you with how good they are. Dancing Chicken leans more savory with soy sauce, garlic, and warm curry notes, while Marry Me Chicken is creamy and rich.
If you enjoy easy, flavor-packed chicken recipes, this is another one worth trying.
Watch the Dancing Chicken Video
You can watch my full Dancing Chicken video below to see exactly how I make it from start to finish:
What Is Dancing Chicken?
Dancing Chicken is a simple baked chicken recipe made with bite-sized pieces of boneless, skinless chicken breasts marinated in a sauce of soy sauce, water, garlic, sweetener, and mild curry powder. It is then baked until tender and flavorful and served over rice.
The name may be playful, but the flavor is serious. The soy sauce gives it a savory base, the garlic adds depth, and the curry powder gives the recipe its warm, distinctive flavor. It is not spicy, but it does have a unique taste that makes it stand out from other easy-baked chicken recipes.
Why You Will Love This Easy Chicken Recipe
There are plenty of reasons to keep this Dancing Chicken recipe in your meal rotation.
It is easy to prepare ahead of time since the chicken marinates in the refrigerator before baking. It uses pantry-friendly ingredients that many home cooks already have on hand. It is also flexible enough to work for both lower-calorie portions and more filling meals, depending on how you serve it.
Most importantly, it is just plain good.
Ingredients for Dancing Chicken
- 1 to 2 pounds boneless, skinless chicken breasts, cut into bite-size pieces
- 1 cup soy sauce
- 1/2 cup water
- 3 to 4 cloves garlic, minced
- 2 tablespoons Truvia Brown Sugar Blend or brown sugar
- 1 tablespoon mild curry powder
- 2 cups cooked rice, for serving
How to Make Dancing Chicken
- Cut the chicken into bite-size pieces and place it in a baking dish or cake pan.
- In a medium bowl, whisk together the soy sauce, water, garlic, Truvia Brown Sugar Blend or brown sugar, and curry powder until well blended.
- Pour the sauce over the chicken and stir gently to coat.
- Cover and marinate in the refrigerator for 2 to 4 hours, or longer if desired.
- Preheat the oven to 350°F.
- Cover the pan and bake for about 45 minutes, stirring a few times during cooking so the chicken cooks evenly and stays coated in the sauce.
- Cook until the chicken is fully cooked through.
- Serve over steamed rice.
Serving Suggestions for Intentional Eating
One of the things I like most about this recipe is how easy it is to portion.
For a lighter meal, serve:
- 1/2 cup cooked chicken
- 1/2 cup cooked rice
For a more filling meal, serve:
- 3/4 cup cooked chicken
- 1/2 cup cooked rice
This makes it easy to fit the recipe into different eating styles and hunger levels.
Tips for the Best Dancing Chicken
If you want the best flavor, give the chicken enough time to marinate. Even a couple of hours makes a difference, and a longer marinating time deepens the flavor even more.
You can also adjust the sweetness slightly to your liking. If you want to keep it lighter, the Truvia Brown Sugar Blend works well. If you prefer a more traditional version, regular brown sugar also works beautifully.
Serve it with rice for a simple meal, or add a vegetable on the side if you want something more complete.
Final Thoughts on This Baked Chicken Recipe
Dancing Chicken is one of those recipes that proves simple ingredients can still create a really memorable meal. It is easy enough for a weeknight dinner, flavorful enough to make again and again, and flexible enough to work for intentional eating.
If you try it, I would love to hear what you think.