Snickers Cheesecake


There is nothing I love more than a good cheesecake. A few years ago we were living in Ireland. We spent about a year and a half in Dublin and then we moved to Dromod, Co. Leitrim. I loved it, but our Internet wasn’t as good. Since I couldn’t work online like I had in the past, I needed another way to make money. I started making and selling desserts; mostly cheesecakes. It was easier to get my home kitchen certified in Ireland than it would have been in the US and I quickly gained regular commercial clients (mostly coffee shops). By the time we returned to the US in 2014, I was getting pretty busy. (If it had been my choice, I would have stayed and continued to grow my business.)

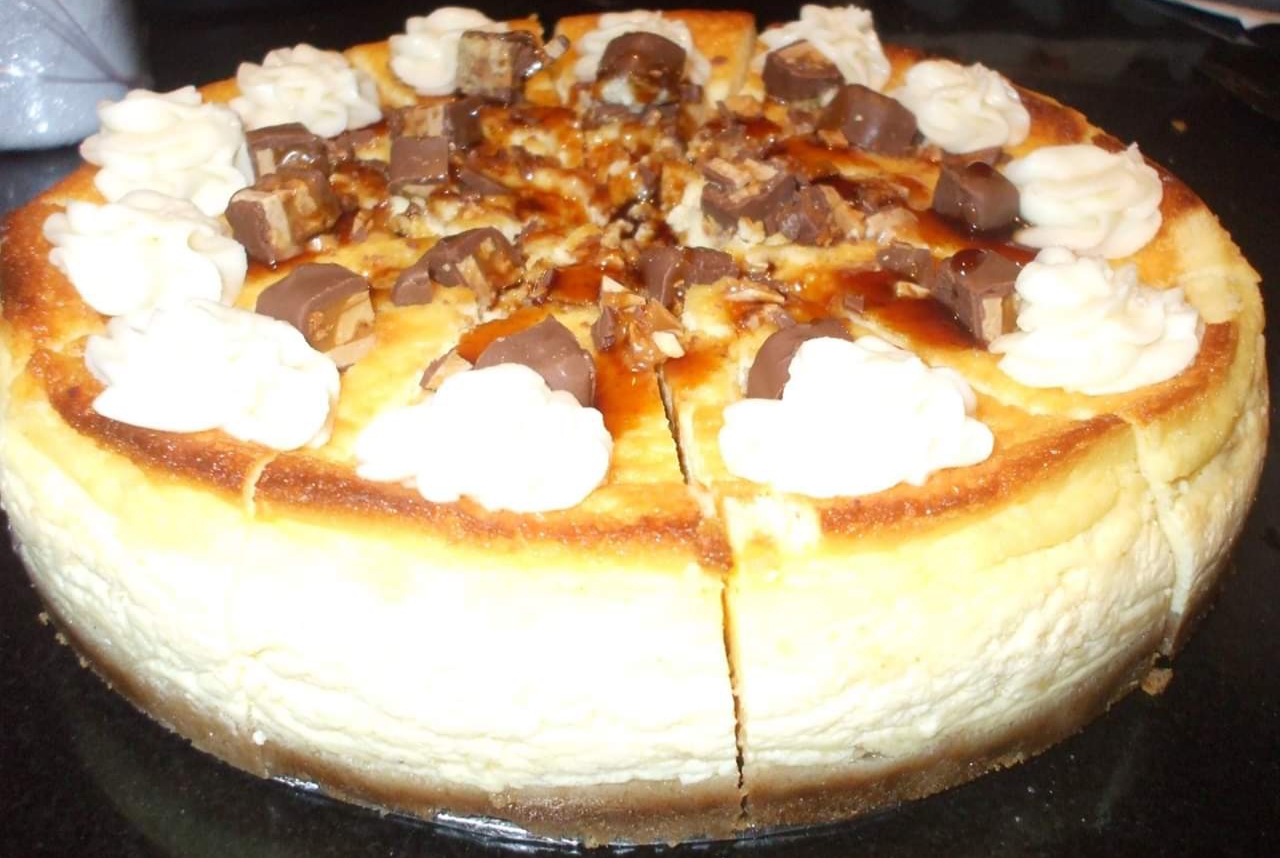
Snickers Cheesecake was my most popular order. I’d sometimes make 5-10 of them a week.

Since it’s Easter, I decided to make one to celebrate and I’m so glad I did. I haven’t had a cheesecake this good in a very long time. For the first time EVER, I’m sharing my recipe here. (Usually only very close friends and family can get this recipe out of me…with a lot of begging and pleading.)

Ingredients

Snickers Cheesecake

20190421_193950

Servings:  8

Prep time: 2 hours

Ingredients

  • 3 (8-oz) packages of cream cheese at room temperature
  • 1 cup granulated sugar
  • 3 eggs
  • 1 teaspoon vanilla extract
  • 1 cup heavy whipping cream
  • pinch of salt
  • 1.5 cups chopped snickers candies (if you use the mini pieces, you can cut them into fourths)
  • Caramel sauce
  • Whipped cream (optional) 

Crust

  • 3 packages of graham crackers
  • 1 cup butter (melted)

You will also need:

  • 1 (9″) springform pan 
  • blender
  • 1 large roasting pan
  • parchment paper
  • foil
  • boiling hot water
  • cooking spray
  • pencil
  • scissors

Directions

  1. Preheat oven to 325º.
  2. Prepare everything for the cheesecake first. Use a pencil to trace the circular bottom of the springform pan onto the parchment paper. I save the insert that comes with the packaging for this also. Cut the circle out with a sharp pair of scissors. 
  3. Spray the bottom and sides of the springform pan. Place the parchment cutout in the bottom and spray it also.
  4. Wrap the bottom and sides of the springform pan with foil. I use four large pieces I can crisscross and then I press them firmly around the outside edge (up the sides). You are trying to prevent water from going inside the pan during baking. 
  5. Place the foiled springform pan inside the roasting pan and set aside. 
  6. Blend the graham crackers until they are fine crumbs. Stir the melted butter into the crumbs until they are all coated.
  7. Press crumb and butter mixture into the bottom of the springform pan. You can either make it one thick layer (or cut the crust ingredients in half) or you can press it up the sides a bit too. Use the back of a spoon. 
  8. For the batter: Cream softened cream cheese and sugar together until smooth.
  9. Add in vanilla extract.
  10. Mix in eggs, one at a time. 
  11. Add pinch of salt and cream and mix until smooth (don’t over-mix). 
  12. Gently fold in one cup of the chopped Snickers bars. Reserve remaining half a cup. 
  13. Pour mixture into the springform pan.
  14. Pour enough boiling water into the roasting pan 1/4 to 1/2 up the sides of the springform pan.
  15. Carefully bake for approximately 1 hour and 30 minutes. 
  16. Do not open the oven for at least an hour. When the cheesecake is done, the top will turn a light caramel color and a knife inserted into the center will come out with a slight amount of cheesecake “goo” on the tip. This is okay. It won’t be completely set during the baking. 
  17. Sprinkle remaining Snickers pieces around the top of hot cheesecake just after taking it out of the oven. I like to decorate the edges of my cheesecake with cream cheese, so I place them in the middle about an inch away from the edge. 
  18. Cool at room temperature for 30 minutes and then cool in the fridge (don’t remove it from the pan) for at least 6 hours (8 is better).
  19. Remove the cheesecake from the pan onto a cake board (or plate or whatever you have). Drizzle caramel over the top for decoration and if you like, decorate the edges with whipped cream. I use homemade whipped cream frosting (recipe to come), but you can do what you like. 

If you like my recipe, please share, but please give me credit and include a link to my blog. Thank you!

Homemade TV Dinners: It’s Cheaper, Healthier and Tastes So Much Better!


There are not very many TV dinner choices in Ireland.  Stores like Iceland have a decent selection, but Iceland stores are not everywhere and they are not where I am currently living.  Even the cheapest TV dinners are not very inexpensive (in my opinion) compared to what you can pay in the U.S., but we have a lot of need for something quick and easy to throw in the oven or microwave, so I decided to make my own.  And I thought I’d share what I did with my readers. 

To start, I need to buy some foil baking containers.  I had hoped to find some smaller, rectangular-shaped shallow containers, but only found deeper ones.  I bought a five-pack of the deeper ones.  I also cleaned out our freezer of any of the meat products we don’t seem to be eating.  I’m either making recipes out of those products or baking them off in the oven to be re-frozen for later use. 

Here are some of my thoughts on things I could make and freeze:

  • Meatballs:  Tony’s mother gave me this idea a few years ago.  She made some amazing Swedish Meatballs and would cook a bunch of them off and then freeze them so when they wanted something easy, all she had to do was heat them up. 
  • Lasagna:  Although, this takes a bit more preparation than some other ideas, homemade lasagna is much better than store-bought.
  • Spaghetti:  Very simple, because you can get away with store-bought sauce (jazz it up a bit) and pasta is cheap and easy.  When you’re ready to make it, butter two sides of sliced bread and sprinkle with garlic powder, pepper, salt and a small amount of Italian seasoning and bake until golden.  Add cheese for cheese bread. 
  • Meatloaf:  Meatloaf is great, because it can be heated up with mashed potatoes and buttered corn or individual slices can be frozen and thawed for meatloaf sandwiches. 
  • Pot Pie:  You can make beef, chicken or turkey.  I used a mini springform pan to make my pot pies, because I didn’t have any mini pie pans.  Once the pie has cooled for 15 minutes, you can separate the springform and carefully remove from the bottom.
  • Various Chicken Dishes:  There’s a lot you can do with chicken.  You can season it various ways and bake it, stuff it with cheese, bread it—any number of things.  Serve with frozen vegetables, mashed potatoes or more.
  • Potato Wedges:  I had a bag of potatoes already and picked up some garlic potato wedge spice.  I’m going to bake them off in the oven and use them as sides with my meat dishes.
  • Burritos:  Burritos are excellent for the freezer.  I’m making breakfast burritos, but you can also do enchiladas, baked chicken wraps and more.   
  • Pizza:  Who doesn’t love pizza?  I guarantee your frozen homemade pizza will knock store-bought frozen pizza out of the park!

Since I don’t have enough baking dishes for everything, I’m going to create five meals using the aluminum pans, a few pot pies, homemade pizza and some breakfast burritos.  I’ll be taking pictures of the food I make and posting recipes, so check back for more.

Blog at WordPress.com.

Up ↑